User Guide
Your local, subscription-free SMS marketing and campaign solution.
1. Getting Started: What You’ll Need
Welcome! This application turns your computer into a powerful SMS campaign hub.
Before you begin, please ensure you have the following:
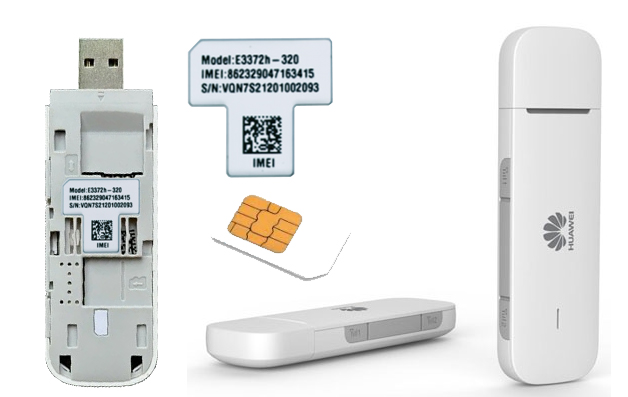
- A Supported Huawei Dongle: This app is designed specifically for the Huawei E3372h-153 & E3372h-320 USB dongles.
- An Active SIM Card: The SIM card must have credit and an SMS bundle to send messages.
- PIN Code Disabled: For seamless operation, it is highly recommended to ensure the PIN code on your SIM card is disabled.
2. Interface Overview
The main window is divided into several key panels:
- Dongle Status Panel: Shows whether the application is successfully communicating with your Huawei dongle.
- Web Interface Panel: View the dongle’s internal dashboard.
- Single Message Panel: Send a quick, one-off SMS to an individual number.
- Template Manager: Manage your saved marketing messages and campaign templates.
- Campaign Manager: The core of the application. Load a list of contacts from a CSV file and send personalized campaigns to your customers.
- Message Forwarding Panel: Configure rules to automatically forward incoming customer replies to your personal mobile number.
- Activity Log: A real-time log showing the status of sending operations and confirmations.
3. Sending a Single SMS
The Single SMS panel is perfect for sending a quick follow-up. It includes an intelligent feature that automatically personalizes your message if you are contacting a customer from your loaded list.
Basic Sending
- Enter the recipient’s phone number in the Phone Number field.
- Type your message in the Message box.
- Click the Send SMS button.
Power User Tip: Automatic Personalization for Existing Contacts
If the phone number you enter exists in your currently loaded client list, the application will automatically perform a “Mail Merge” for that individual message.
This allows you to use placeholders like `{Name}`, `{Field 1}`, `{Field 2}`, etc., even for single messages.
Example Workflow:
- You have a list loaded containing **Phil** with the phone number `07123456789` and `Field 1` set to `Full Valet`.
- You type `07123456789` into the “Phone Number” box.
- In the “Message” box, you type:
Hi {Name}, thank you for your interest in our {Field 1} service! - The application will automatically find Phil’s data and send:
Hi Phil, thank you for your interest in our Full Valet service!
4. Batch Sending from a CSV File
This feature allows you to send hundreds of personalized marketing messages automatically.
The CSV File Format
Your CSV file should follow this column order. The headers (Row 1) can be customized; the application will use whatever text you put in the headers as a placeholder code.
| Column 1 | Column 2 | Column 3 | Column 4 | Column 5 | Column 6 | Column 7 | Column 8 |
|---|---|---|---|---|---|---|---|
| Phone Number |
Name | Custom Message |
Field 1 | Field 2 | Field 3 | Field 4 | Status |
- PhoneNumber: The recipient’s mobile number. (Required)
- Name: The recipient’s name (Placeholder: `{Name}`).
- Custom Message: A unique message for this specific person. If empty, the default template is used.
- Fields 1-4: Flexible data fields for personalization (e.g., Products, Discount amounts, Deadlines, or Promo codes).
- Status: Used by the app to track progress.
Personalization Placeholders
The app replaces placeholders with data from your CSV. Use the exact text from your header row inside curly braces:
The Campaign Workflow
- Load CSV: Click “Load Client List” and select your file.
- Set Delay: Choose the delay between messages (3-5 seconds is recommended).
- Start Batch: Click “Start Sending”.
- Monitor: Watch the status column for “Sent” confirmations.
- Stop/Resume: You can stop the batch at any time. When you click start again, the app will resume from where it left off by skipping rows with a “Sent” status.
- Save: Save your list after the campaign to keep a record of which numbers were successfully contacted.
5. Using Message Templates
Templates allow you to save your best-performing marketing messages.
- Using a Template: Select one from the dropdown menu. This message will be used for all contacts who don’t have a “Custom Message” defined in the CSV.
- Creating a Template: Type your message into the text box and click “Save Template As…”. Remember to use your placeholders like `{Field 1}`.
6. Automated Message Forwarding
Capture customer replies (leads) directly on your own mobile phone.
- Check Forward Unread Messages To:.
- Enter your personal mobile number.
- Choose a rule:
- Forward all: Every reply is sent to your phone.
- Filter by content: Only forward if the customer replies with a specific word, like “YES” or “HELP”.
7. Troubleshooting & FAQ
- The “Dongle Status” is stuck on “Connecting…”
-
- Ensure the dongle is plugged in and the drivers are installed.
- Try a different USB port.
- Messages are failing.
-
- Check SIM card credit/SMS balance.
- Verify that phone numbers include the correct country format.
- Increase the delay between messages to prevent network throttling.
- Placeholders are not working.
-
- Ensure the placeholder text inside the `{ }` matches your CSV header row exactly.